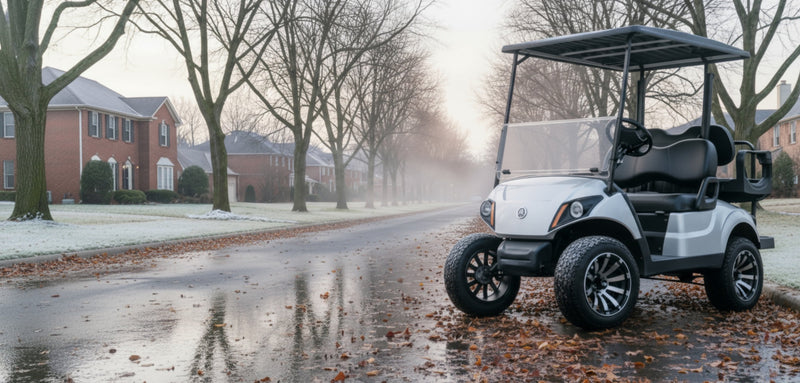
Real visibility for fall and winter riding
Short days sneak up fast. If you are rolling before sunrise or after dinner, the right lighting can turn a sketchy ride into a calm, predictable one. Here is a clear guide to headlights, wiring, reflectivity, and courteous use, so your golf cart is seen -- and seeing -- all season.
Lumens vs Beam Pattern: What Actually Helps You See
Lumens get the headlines, but beam pattern decides whether you can read the road. A smaller, well-shaped beam often beats a huge number that sprays light everywhere.
- Lumens: total light output, useful for comparing similar lamps
- Beam pattern: how light is shaped, critical for distance and peripheral vision
- Hotspot and spill: hotspot for reach, spill for edge awareness
- Cutoff line: prevents glare to oncoming traffic and neighbors
What to do: pick LEDs with a defined low-beam cutoff and a steady hotspot. If your kit offers both low and high beam, wire both so you can switch as conditions change.
Shop ideas: Light Kits
Headlight Aiming That Works in the Real World
Good lamps aimed poorly are still bad lamps. A quick driveway aim saves everyone’s eyes.
- Level surface: park 25 feet from a wall, mark headlight height on the wall
- Low beam mark: aim the cutoff so it sits slightly below the mark
- Even alignment: center hotspots left to right so the beam covers your lane
- Recheck loaded: add passengers or gear and verify the aim again
Wiring Basics, Made Simple
Clean wiring is safety. It also prevents random shutdowns on cold, damp nights.
- Voltage reducer: most electric carts need 48V or 36V to 12V conversion, match reducer output to your kit’s draw
- Fuse and relay: place a fused feed near the source, use a relay for high-current lamps
- Wire gauge: size for current and length, err on the side of thicker cable for main runs
- Grounds: use a common, clean ground point, avoid stacking too many rings on one stud
- Connectors: weather-sealed plugs and heat-shrink butt splices keep corrosion out
- Harness routing: protect from sharp edges and moving parts, add loom where it rubs
If wiring is not your thing, choose a pre-loomed kit with labeled connectors. Your future self will thank you.
Browse: Light Kits
Be Seen from Every Angle: Reflectors and Mirrors
Seeing forward is half the job. The other half is letting others see you early.
- Reflectors: add rear and side reflectors near the wheel arches for sweep visibility
- Conspicuity tape: tasteful strips on the rear frame or bagwell increase night pickup
- Turn signals: clear communication beats hand signals in the dark
- Brake and tail lights: bright, even output helps following traffic judge distance
- Mirrors: wide-view side mirrors reduce headlight glare and help you hold a line
Helpful additions: Light Kits • Mirrors
Night and Neighborhood Etiquette
A little courtesy keeps carts welcome in shared spaces.
- Low beam first: use high beam only when you need reach and no one is facing you
- Slow near homes: dim early, pass calmly, avoid revving or horn taps at night
- No headlight highs in driveways: point the cart slightly away when waiting
- Local rules: check your city or HOA for lighting and reflector requirements
Good, Better, Best: Simple Upgrades
Keep it easy. Pick the level that matches how you drive.
- Good: LED low beams with clean cutoff, basic reducer, add reflectors
- Better: low and high beam kit, fused relay harness, tail and brake lights, wide mirrors
- Best: full street kit with signals, horn, hazard, vented windshield for fog control, rear reflectors, tidy harness with sealed connectors
Start here: Light Kits • Mirrors
Quick Checklist Before Your First Dark Ride
- Aim: verify the low-beam cutoff below headlight height at 25 feet
- Secure: check all connectors, fuses, and grounds for tightness
- Test: low, high, tail, brake, and signals, then confirm mirror angles
- Carry: a small torch and spare fuses, just in case
FAQ: Enlightened Cart Upgrades
Do I need a voltage reducer?
Yes if your cart is 36V or 48V. Use a regulated 12V reducer sized for your kit’s draw (often 10–20A). Don’t tap a single battery—it causes uneven wear and flicker.
How many lumens should I get?
Prioritize beam pattern over raw lumens. For neighborhood riding, ~600–1200 lm per side with a sharp low-beam cutoff is ideal. Add a switchable high beam for dark routes.
How do I aim headlights correctly?
Park 25 ft from a wall on level ground. Mark headlight height on the wall. Aim the low-beam cutoff slightly below that line and center the hotspots left-to-right. Recheck with passengers or cargo.
Need help choosing a kit or sorting reducer sizing? We are happy to help. Reach out on our Contact page and an RM Cart expert will guide you to a clean, reliable setup.